Accessing the Gradebook
There are three access points to the gradebook.
- The Gradebook link on the My Courses page.
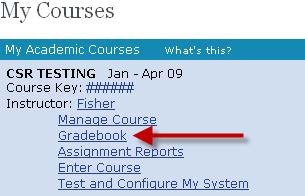
- The View Gradebook link on the Manage Course page.

When you launch the gradebook from the My Courses homepage or from the Manage Course page, it will automatically expand the module containing the most activity within the last week.
- The gradebook link on the syllabus page.

This link takes you directly to the module selected.
Navigating the Gradebook
Student names and information are located in the left most column. Course content and activity information occupies the rest of the window.
In the menu bar at the top of the window, you will find tools that will aid navigation through the gradebook, such as Find, Expand All and Collapse All. Other tools such as reloading information and exporting data are also in this menu bar.

The gradebook organizes information in units and modules.
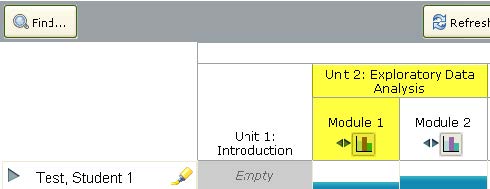
When a module is in collapsed mode, the gradebook indicates student progress through the available activities with a blue progress bar.
Note: Modules often differ in the number and complexity of activities they contain. Comparisons on time spent or effort cannot be made.
For example: Module 3 may contain one My Response activity while Module 4
contains several labs and an assessment.
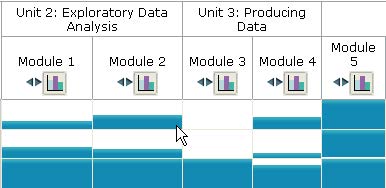
Expanding Modules
Expanding a module will display all of the student work that can be viewed, graded, or otherwise manipulated.
To expand or collapse a module, click on the double arrows under the module heading.
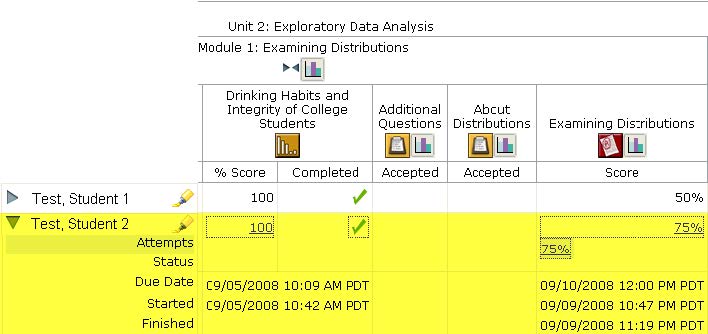
When a module expands, each available activity will appear. In the example module displayed below, you will see icons that indicate My Response, StatTutor and an assessment are available for an instructor to view.
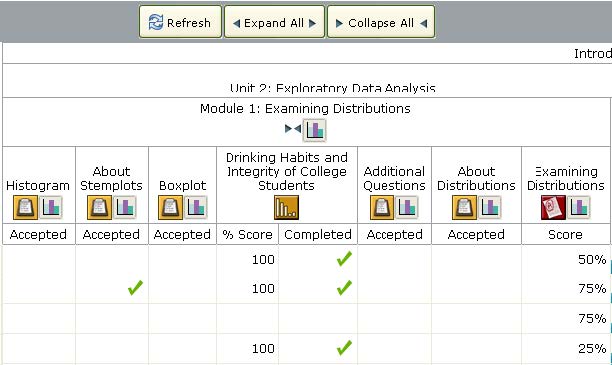
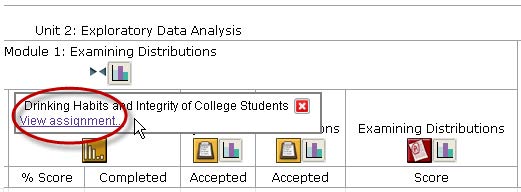
If you would like to view an original copy of an activity (without a student’s work), clicking the activity title will reveal a link to that activity.
Expanding Student Records
Expanding a student will display pertinent information regarding that student and the student’s work across units and modules.
This information includes the times and dates a student started and (if applicable) finished an activity. Also, if an activity allows multiple attempts, such as some assessments, you will be able to access individual attempts here.
To expand a student row, click the right pointing arrow just before the student’s name.
To collapse a student’s record, click the downward pointing arrow just before the student’s name.
Viewing Student Work
There are two different ways to see student information and work.
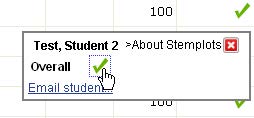
First, if an activity has a score or completion grade, clicking on the numeric score or other mark (such as a red x or a green checkmark) will open a window containing a link to the student’s work.
Grading Assignments
If your course contains assignments that require instructor grading, you will be able to access these assignments right from the gradebook.
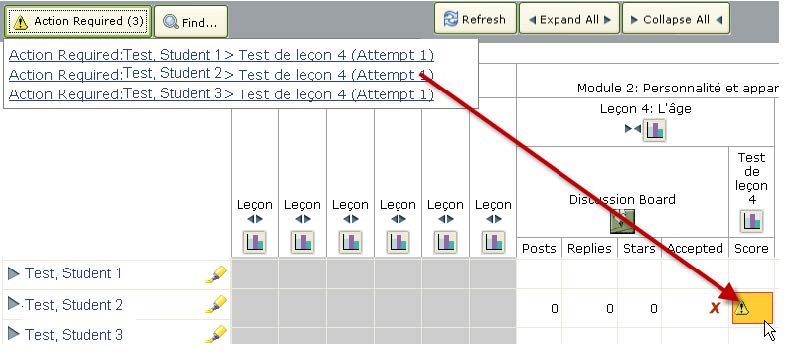
When a student submits work for an instructor to grade, a button will appear in the gradebook’s top menu bar. Clicking on this button reveals links to assignments that require your action.

Clicking on this link will open the module containing the assignment. The gradebook highlights the assignment in orange. Click on the assignment to view the student’s work, assign scores and provide feedback.
The Find Button
The Find Button gives you an alternative method to locate a particular student, module or activity. Click the button to reveal the search field.
- To search for a student, enter the student’s name, account id or e-mail.
- To search for an activity, enter as much of the activity name that you recall.
After entering your search term and clicking go, a list of links will appear. Clicking on a link will take you to the individual or activity indicated.

Exporting and Printing Data
There are two buttons to export the OLI gradebook. The Excel button contains the students' names only while the Blackboard button includes the students' OLI Account IDs (often email addresses). The resulting export is a csv file that can be imported into Excel, Blackboard, or other sheet programs or Learning Management Systems.

1. Expand the columns for export as only visible columns will be in the exported results. Use the expand and collapse buttons at the top of each module or the expand all and contract all buttons as needed to set up the view before exporting.
2. Click the Excel or Blackboard button. In a couple seconds, the csv file will download to your device based on your browser's settings. If there is no notification from the browser, press CTRL + J to open the recently downloaded files.
You are also able to send the gradebook to a printer. The print button will allow you to print your current view.
